

There comes a time in every homeowner’s life when the thought strikes like a flash of lightning through a quiet sky: Why pay a master when I can become one myself? Yes, we’re talking about installing interior doors — not with fear in your heart and sawdust in your eyes, but with steady hands, a pinch of patience, and this step-by-step guide in your back pocket.
A home’s character begins not with its walls, but with the way its doors swing open to welcome life inside.
If you’re still dreaming of that perfect match between form and function, you might want to explore some inspiring options for interior doors in Miami — crafted with elegance and built to last. You can check them out at the https://indigodoors.com/
So tighten your tool belt, pour yourself a cup of confidence, and let’s turn you into the hero your hallway never knew it needed.
What You’ll Need to Get Started
Before the first nail sings and the first hinge squeaks, gather your sacred tools. You don’t need a garage full of gadgets — just a few loyal allies:
- Tape measure
Measure twice, install once. Precision is your best friend. - Level
Unless you want doors that swing open like ghost stories. - Screwdriver or drill
To tighten, twist, and conquer. - Hammer and nails
For the old-school touch. - Shims
Thin, mighty warriors that keep things straight. - Utility knife
When the moment demands a sharp decision. - Wood filler and sandpaper
To smooth out any imperfections, like time itself.
This isn’t just a toolkit — it’s a ritual. Each item is a charm against chaos, a wand for turning disorder into symmetry. Think of them as characters in your home-improvement epic, each one playing its role in the creation of something enduring and beautiful.
Measure and Choose the Right Door
This isn’t just a door — it’s a statement. Start by measuring your door frame: height, width, and depth. Be sure to pick a door that fits your space and your aesthetic. Whether you crave minimalist modern or rustic romance, your door should whisper your style even before it creaks.
Don’t just measure — envision. Walk past the empty frame and imagine the sound it will make when it shuts with purpose. Will it be a soft click or a firm thud? Will it frame sunlight at noon or hush the darkness at night? Your door is more than a barrier. It’s a scene waiting to unfold.
The right door doesn’t just separate rooms. It connects moods, memories, and meanings.
Remove the Old Door (if necessary)
Bid farewell to the past with grace. Use a screwdriver to pop the hinge pins and gently lift the door free. Don’t rush. Doors, like people, deserve a respectful exit.
And while you’re at it, thank the old door for its service. For every secret it kept, every argument it muffled, every breeze it blocked — it did its job. But now, it’s time to make way for something fresh. Something better. Something you crafted with your own two hands.
Letting go of the old makes room for what’s meant to come through next.
Prepare the Door Frame
Here’s where the real magic begins. Check for warping or irregularities. Sand down any splinters. Vacuum the dust of decades. If your frame isn’t level, shims are your silent saviors.
- Check the corners
A square door in a crooked frame is a tragedy waiting to happen. - Smooth the surface
No one wants their door to grind like an old mill wheel.
This stage is the meditation of the process. It’s where you slow down, breathe in the scent of old wood, and listen to the whisper of the structure. Behind every perfect swing lies a perfectly prepped frame. This is where future silence and symmetry are born.
A strong frame is the soul of every solid door.
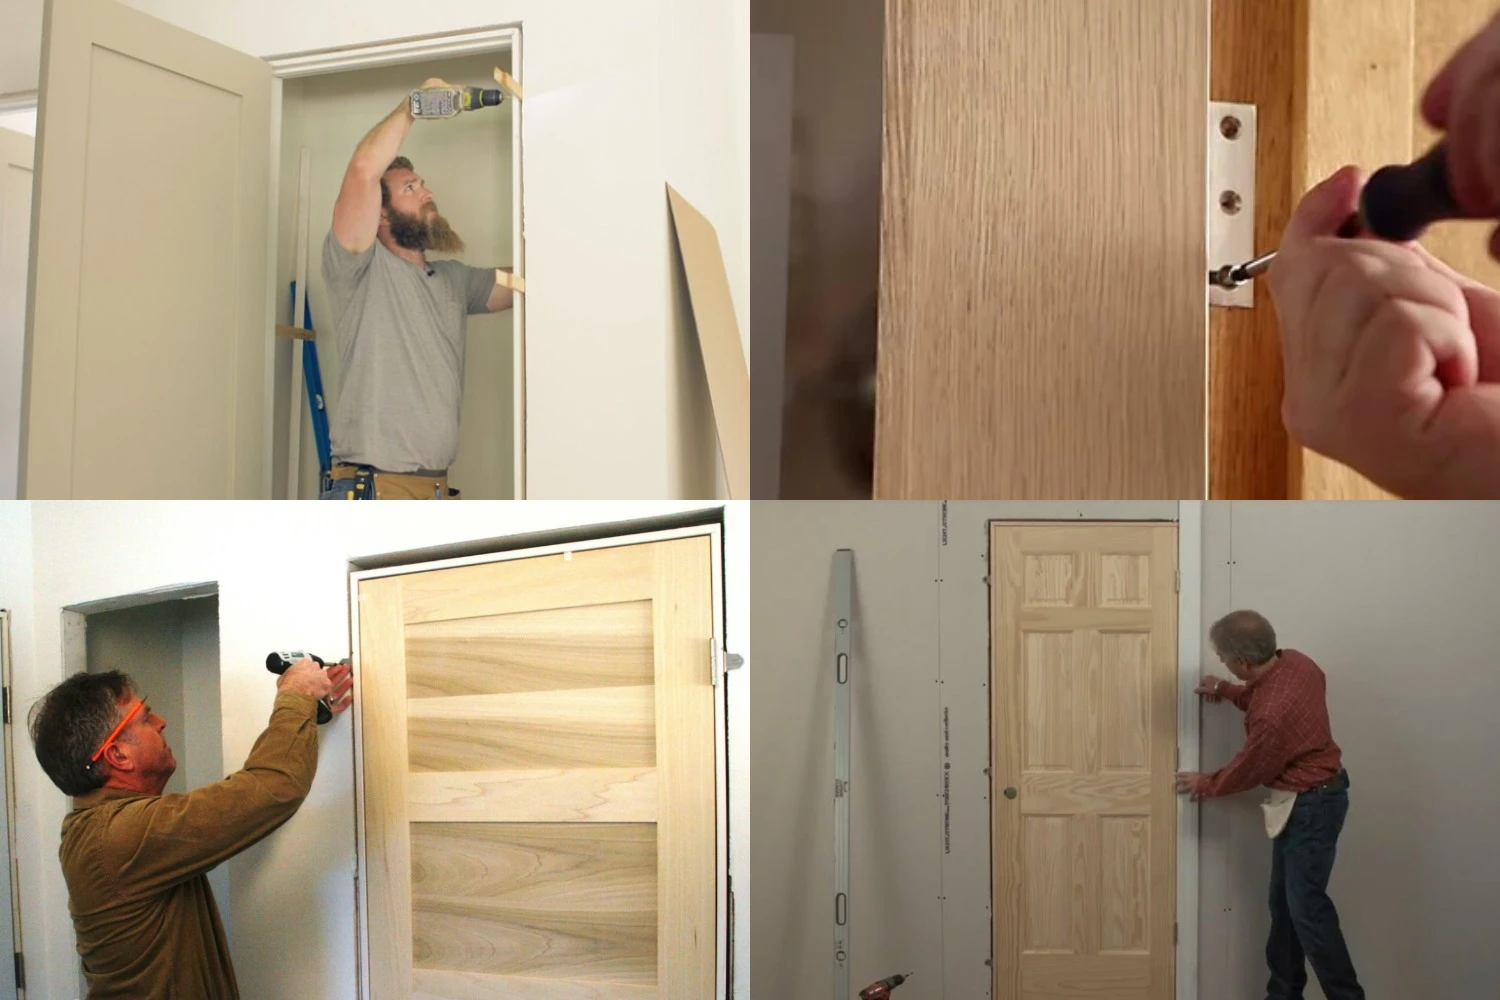
Position the New Door
Place your new door in the frame like a jewel in its setting. Use shims around the edges to hold it temporarily.
- Check the swing
Make sure it opens the way you want — in or out, left or right. - Test the fit
A good door should have a 1/8 inch gap on all sides — just enough to breathe, not enough to gossip through.
Positioning is more than logistics — it’s choreography. You’re aligning this silent sentinel to pivot, to protect, to perform. Imagine it opening onto birthdays, late-night confessions, rainy afternoons. How it stands now sets the stage for every moment to come.
A door positioned well is a future well opened.
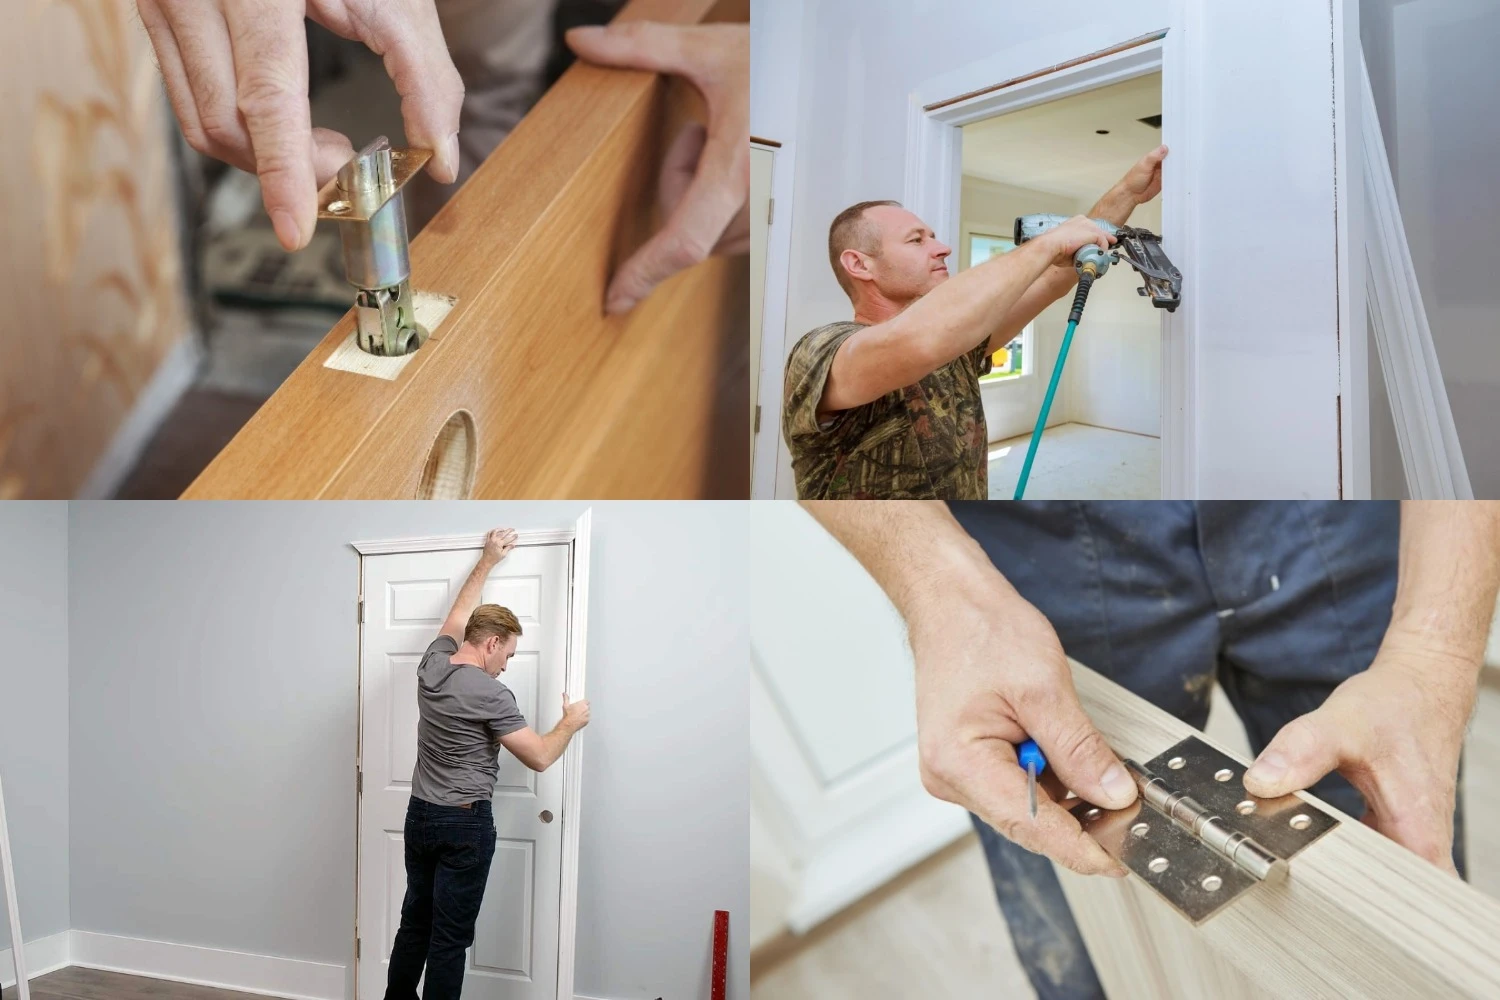
Attach the Hinges
Here comes the dance of precision.
- Mark hinge placements
Typically 7 inches from the top and 11 inches from the bottom. - Mortise the hinge spots
Use a chisel or router so your hinges sit flush like royalty on a throne. - Secure with screws
And don’t rush — a stripped screw is the villain of every installation tale.
Hinges are the poetry of mechanics. They are small, humble things, but within them lies all the drama of movement and stillness. When attached with care, they let your door glide with dignity. When neglected, they moan like forgotten violins.
A hinge hung wrong sings forever out of tune.
Hang the Door
Here it is — the moment when your hands become legend.
- Insert the top hinge pin first
Let gravity and dignity guide you. - Wiggle and align
If it resists, coax it gently. Never force a door that simply needs to be understood.
As you hang the door, let your hands be calm. Let the weight of the wood become part of your rhythm. Don’t think about what could go wrong. Think about what you’re aligning — not just hardware and lumber, but function and form.
When the door finally stands on its own, it reflects the steadiness of its maker.
Test, Adjust, Repeat
Now, close it. Open it. Stand back and marvel. But don’t uncork the champagne just yet.
- Check the swing
It should glide like silk, not stutter like a nervous poet. - Tweak the shims
Tap them gently for perfection, then trim the excess. - Fill the gaps
Use wood filler if needed and smooth with sandpaper.
This is the moment to fine-tune your creation. It’s not about flawlessness — it’s about finesse. Even a millimeter makes a difference here. This is where craftsmanship meets love.
Perfection is not a moment — it’s a series of small decisions, well made.
Install the Hardware
A door without a handle is like a symphony without a finale. Choose knobs or levers that suit your taste.
- Drill your holes with care
Measure twice, cut once — again. - Secure the latch and strike plate
The sound of a door clicking shut should be satisfying as applause.
Here’s your finishing flourish. The jewelry. The signature on your handiwork. Make it elegant. Make it yours. Let the handle feel like a handshake with your home.
Hardware is not just function — it’s fashion for your fingers.
Bonus Tips for a Flawless Finish
- Paint or stain before hanging
It’s easier to dress your door while it’s lying flat like a canvas. - Use masking tape for clean edges
Let no drip tarnish your masterpiece. - Oil the hinges
A silent door is a polite one. - Choose the right trim
A well-framed door is like a well-framed painting — it elevates everything around it.
This final step is where you add your personal touch — the soul print, the flourish. Take your time. This is the part that transforms a job into a craft, a task into a legacy.
Why Do It Yourself?
Because it’s more than just saving money.
Every screw you tighten, every hinge you align — it becomes part of your story, etched in the grain of your home.
You learn. You grow. You swear a little. But in the end, you win.
There’s pride in sweat. In solving things with your hands. In stepping back and seeing something beautiful, standing tall because you willed it to.
So, you did it. With grit, grace, and probably a little sawdust in your hair. You’ve transformed not just a room — but yourself.
A door isn’t just an object. It’s a threshold. And now, you’ve crossed one too.
Whether you’re sprucing up a guest room or turning a spare space into a sanctuary, you’ve proved one thing: you don’t need a professional when you’ve got persistence, poetry, and a power drill.
Your home now bears your mark. Walk through it with pride.


